
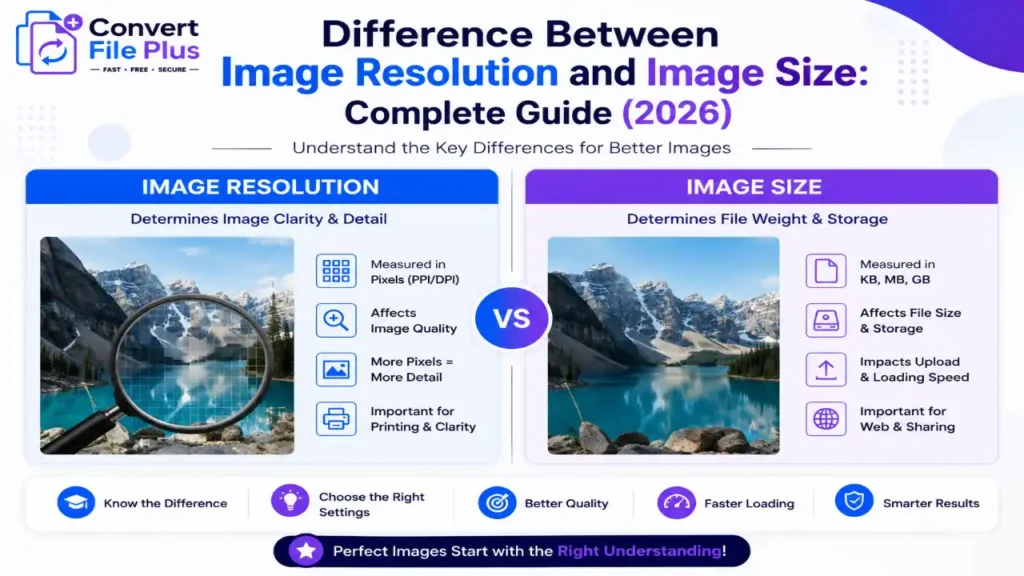
Here’s something most people never think about until they’re staring at a rejected upload: a photo can look perfectly sharp on your phone screen and still get bounced by a government portal. I’ve watched this happen to friends applying for everything from PAN cards to visa slots, and almost every time, the root cause is the same mix-up — confusing image resolution with image size. They sound like they should mean the same thing. They don’t.
This confusion shows up constantly with Aadhaar. A lot of the search traffic around this topic is really just people trying to figure out the size of photo in Aadhar card India requirements, because the enrollment and update portals are notoriously picky. One wrong dimension or an oversized file, and you’re back to square one.
It’s a small technical detail with a surprisingly large impact. Government ID systems in India process photo submissions at a massive scale, and even a tiny percentage of rejected uploads adds up to a lot of frustrated applicants. So it’s worth spending ten minutes actually understanding what resolution and size mean — separately — before you upload anything.
By the end of this piece, you’ll know exactly why your photo might be too “big” in one sense and too “small” in another, and specifically what the size of photo in Aadhar card India rules actually expect from you.
Resolution vs. Size: They’re Not the Same Thing
Let’s clear up the basic confusion first, because it trips up even people who work with computers every day.
Resolution refers to how many pixels make up an image — usually expressed as width × height, like 1920×1080. More pixels generally means more detail, sharper edges, and a photo that holds up when it’s printed or zoomed into.
File size refers to how much storage space the image takes up on a disk — measured in kilobytes (KB) or megabytes (MB). This depends on resolution, but it’s also heavily influenced by compression, color depth, and file format.
Here’s the part that confuses people: two photos can have identical resolution and wildly different file sizes. A JPEG compressed aggressively might be 40KB, while the same resolution saved as an uncompressed PNG could be several MB. Government portals almost always care about both numbers separately — and they set limits on each.
- Resolution determines how the photo looks — sharp or blurry, detailed or pixelated.
- File size determines whether the server will even accept the upload.
- Compression is the bridge between the two — it shrinks file size, sometimes at the cost of visual quality.
Most rejection messages on Indian government portals (“photo does not meet requirements”) are really just size or format mismatches, not anything wrong with how the photo actually looks.
So, What Exactly Is the Size of Photo in Aadhar Card India?
This is where most of the confusion actually starts. People assume “photo size” means one single number, but the Unique Identification Authority of India (UIDAI) actually specifies two separate things: the physical/print dimensions and the digital file requirements.
According to guidance published on the UIDAI official website, passport-style photographs used during Aadhaar enrollment or updates need to be recent, clear, and taken against a light or white background — the kind of standard specification you’d expect for any biometric ID document.
In practical terms, most enrollment centers and update portals in India work with these commonly followed specifications:
- Physical dimensions: 3.5 cm × 4.5 cm (the standard portrait passport-photo size used across most Indian ID applications).
- Background: plain white or light-colored, no patterns or shadows.
- Format: JPEG, since most government portals don’t accept PNG or HEIC uploads.
- Expression: neutral, eyes open, no glasses with tinted lenses.
I’d flag one honest caveat here: file-size limits (in KB) for online updates can vary depending on which portal or service you’re using — enrollment-center capture, online demographic update, or a related e-KYC service — so it’s worth checking the specific upload page before you submit anything, rather than assuming a single number applies everywhere. UIDAI’s own resources page is the safest reference point for that.
Since Aadhaar photos double as biometric verification images, they’re treated more strictly than a casual passport photo. The system checks your current appearance against the photo on file, so an old photo — say, from before a beard, weight change, or different hairstyle — can genuinely cause a mismatch flag.
Why Portals Reject Photos Even When They “Look Fine”
Here’s something that trips up almost everyone: the photo can look completely normal to your eyes and still get rejected. That’s because the rejection usually isn’t about how it looks — it’s about the underlying data.
A few common culprits:
- Wrong aspect ratio. Cropping a square photo into a rectangular slot distorts the face proportions the system expects.
- File size just over the limit. Portals do byte-level checks; being 1KB over a cap can trigger an automatic bounce.
- Wrong color mode. Some scanners or old cameras save in CMYK instead of RGB, which government upload tools generally reject outright.
- Background not plain enough. A slightly patterned wall or uneven lighting reads as “non-compliant background” to automated checks.
Honestly, most people don’t think about the last one — but background variance is one of the most common silent rejections across Indian government photo uploads, not just Aadhaar.
How to Prepare a Compliant Photo Without Overthinking It
You don’t need studio equipment to get this right. A decent smartphone camera and a plain wall will usually do the job.
A few practical steps:
- Stand about two feet from a plain white or light wall, with even lighting (natural daylight near a window works well).
- Keep a neutral expression — no smiling, no tilted head, eyes fully open.
- Take the photo in landscape mode if you’re capturing on a phone, then crop it to the required portrait ratio afterward.
- Save the final file as JPEG, and check the file size before uploading — most photo editing apps show this under “file info” or “properties.”
- If the file is too large, reduce it through compression rather than shrinking the resolution drastically — you want to preserve facial clarity.
Getting the size of photo in Aadhar card India right isn’t about fancy editing software — it’s about following the sequence above in order, rather than jumping straight to compression.
That last point matters more than people realize. Dropping resolution too aggressively to hit a small file-size target can leave you with a blurry, low-detail photo that fails the “clear image” requirement even though it technically meets the KB limit.
A Quick Word on Other ID Photo Sizes
Since Aadhaar photo confusion often bleeds into other documents, it helps to know how it compares:
- PAN card: similar passport-style dimensions, but some application forms specify slightly different proportions — always check the current NSDL or UTIITSL guidelines before submitting.
- Indian passport: typically a square format, around 51mm × 51mm, quite different from Aadhaar’s rectangular portrait shape.
- Driving license and voter ID: generally follow passport-style proportions as well, though state transport departments sometimes add their own minor variations.
The takeaway: don’t assume one photo works for every document. Each authority sets its own combination of resolution, file size, and format — and mixing them up is one of the most common reasons applications get delayed.
Wrapping Up
Resolution and file size aren’t interchangeable, even though everyday language treats them that way. One is about how detailed an image is; the other is about how much digital space it occupies. Government portals — Aadhaar included — care about both, for different reasons.
If you’re specifically trying to nail the size of photo in Aadhar card India rules, the safest approach is simple: stick to the standard 3.5×4.5 cm portrait format, use a plain white background, save as JPEG, and confirm the current file-size cap on the official UIDAI portal before you upload. Requirements do get updated occasionally, so a five-minute check beats assuming last year’s numbers still apply.
None of this is complicated once you separate the two ideas in your head. It’s just that most people never had a reason to learn the difference — until a portal rejected their photo and they were left wondering why a “perfectly good” picture didn’t work. That’s usually the moment it clicks.

- Difference Between Image Resolution and Image Size: Complete Guide (2026) - July 13, 2026
- How Much Does AI Software Cost for Startups in 2026? - July 7, 2026
- How to Use AI to Write Blog Posts Faster Without Losing Your Voice - June 28, 2026