
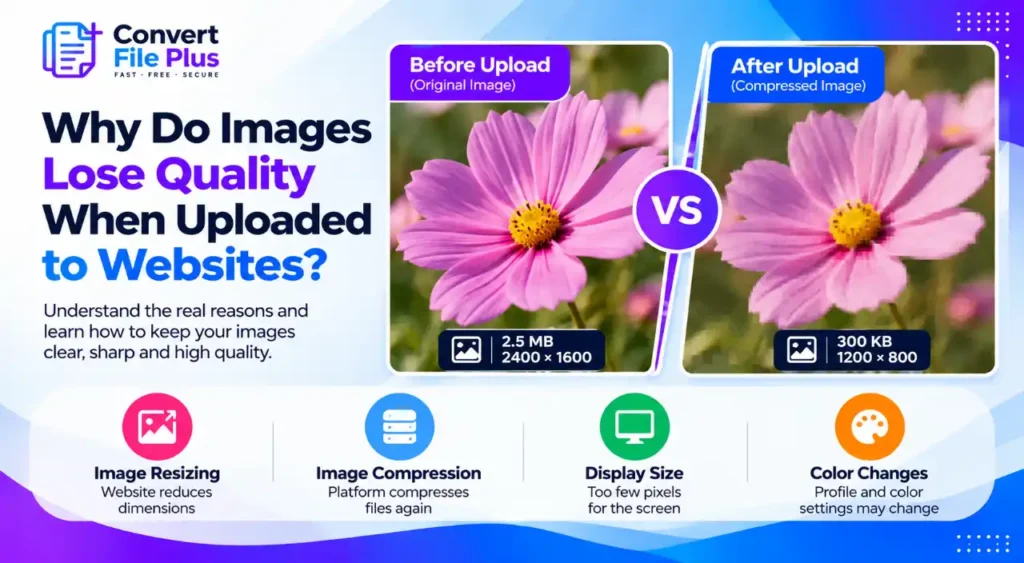
Does your image look sharp before uploading but blurry, pixelated, or dull after it appears on a website? The cause may be resizing, repeated compression, insufficient resolution, or changes to color settings.
Many websites create processed copies of uploaded images for display, so the original file may remain unchanged. This guide explains how to identify the cause, fix common image quality problems, and prepare images that look clear on desktop and mobile screens.
First, confirm the image actually changed
Blur is not always damage. Before changing anything, compare three things:
- Pixel dimensions. Open the live image in a new browser tab and compare its width and height with your original.
- File size. A large drop, such as several megabytes down to a few hundred kilobytes, points to resizing, recompression, or both.
- Displayed size versus natural size. Browser developer tools show how large an image is drawn on the page and how large the file actually is. If the drawn size is bigger than the file, the browser is stretching it.
If the served file matches your original but still looks soft on the page, check whether it is being stretched beyond its natural dimensions or displayed in a way that makes softness more noticeable.
Why uploaded images lose quality
1. The site resizes your image
Many websites generate smaller image versions for thumbnails, banners, and content areas rather than displaying the original upload everywhere.
WordPress may also scale large uploads, depending on its version and settings. Your theme or editor determines which image size appears on the page. If a small thumbnail is stretched across a wide banner, the result can look blurry even when a larger version is available.
2. The site compresses it again
Websites and image optimization tools may compress images to reduce download sizes. Aggressive or repeated lossy compression can create visible artifacts, especially around small text, sharp edges, fine textures, and smooth gradients.
If the uploaded image looks worse on the live page, compare it with the original and check whether your website, CDN, or optimization plugin is applying additional compression. Compression settings vary, so test your own setup rather than assuming one default applies everywhere.
3. The image has too few pixels for the screen
An image can look crisp on a standard monitor and soft on a phone. High-density screens use two or more physical pixels for every CSS pixel. Cloudflare’s documentation gives the example of a 960-pixel image on a 2x display: the browser stretches it across 1,920 physical pixels, so it appears blurry.
The fix is to supply an image at roughly twice its display width, ideally with srcset so each device downloads a suitable file. Our guide to image resolution versus image size explains why pixel dimensions and file size are different things.
4. The format does not suit the content
Screenshots, logos, and text-heavy graphics have hard edges that lossy JPG tends to smear into fuzzy halos. A transparent PNG saved as JPG loses its transparency. Photos saved as PNG can become very large, which tempts platforms and plugins to compress them harder. Our image format guide compares the options.
5. The colors changed
If the image looks duller rather than blurrier, suspect the color profile. Cameras and editors often work in color spaces wider than the sRGB space the web assumes. When an export strips the embedded profile or skips the conversion, colors can look flat.
Experts in Adobe’s community forums recommend converting to sRGB and embedding the profile when exporting for the web. In Photoshop’s Export As dialog these are separate options, and both matter. Menu names vary by app and version, so check your editor’s export settings.
Which cause fits your symptom?
| Symptom | Likely cause | What to check |
|---|---|---|
| Soft everywhere, even on desktop | Over-compression or a small source file | Compare file size and pixel dimensions with the original |
| Sharp on desktop, soft on phone | Too few pixels for high-density screens | Displayed versus natural size; add a roughly 2x version or srcset |
| Blurry in one spot only (banner, thumbnail) | Wrong size variant, or the theme stretches the image | Size setting in the editor; container width in the theme |
| Text and edges look fuzzy or haloed | Screenshot or graphic saved as JPG | Re-export as PNG or lossless WebP |
| Colors look flat or shifted | Profile stripped or not converted to sRGB | Export in sRGB with the profile embedded |
| Fine in the Media Library, worse on the page | Page serves a different size or optimized copy | Open the live image URL in a new tab and compare |
How to prepare images so they survive upload
- Keep an untouched master. Edit and export copies. Never re-upload a copy you downloaded from your own site, because it has already been compressed.
- Find the display width. Check your theme’s content width, or use developer tools on a similar image already on your site.
- Choose suitable dimensions. For an image displayed at 800 pixels wide, a 1,600-pixel version can help on 2x screens. Adjust this to your actual layout and platform requirements.
- Choose the format and compression settings. Use JPEG or WebP for photographs, and PNG or lossless WebP for graphics that need crisp edges or transparency. Compare quality at the size visitors will see.
- Test compression quality. Compare different quality settings and look for visible
- Check color settings. For typical web use, convert to sRGB where appropriate and preserve the color profile when your export workflow supports it.
- Test the live page. Open the published image on desktop and mobile, then compare its dimensions and appearance with your original.
If you want a web-ready WebP copy of a JPG, the ConvertFilePlus JPG to WebP converter lets you set a resize and a quality mode (original, lossless, or lossy) for individual images, with a stated 50 MB per-file limit. The page also mentions a daily limit on free conversions. Check the result at full size, and serve a JPG or PNG fallback with a picture element, as Google’s guidance recommends, for software that cannot open newer formats. For more on balancing size and sharpness, see our guide to reducing file size without blur.
Common mistakes
- Uploading images without checking dimensions: Match the image dimensions to its intended display size and platform requirements.
- Reusing compressed copies: Keep an original master and export fresh versions whenever possible.
- Expecting conversion to restore lost detail: Converting an already compressed JPG to WebP does not recover detail that has already been lost.
- Stacking optimization tools: Multiple plugins or CDN settings may apply overlapping transformations. Test your configuration and check the final image.
- Judging quality only at extreme zoom: Inspect images at normal display size and check important details at 100% zoom when needed.
For WordPress-specific optimization advice, see our guide to compressing images in WordPress.
Frequently asked questions
Conclusion
When an image looks worse after upload, compare the live version with your original before changing settings. Check dimensions, compression, display scaling, format, and color handling to identify the likely cause.
For future uploads, use appropriate dimensions and formats, preserve a high-quality original, and test the published result on both desktop and mobile.

- Why Is My Instagram Picture Blurry Before Posting? - November 2, 2026
- Why Do Images Look Blurry on Instagram After Uploading? How to Fix It - November 1, 2026
- Why Do Images Look Different on Different Screens? - October 31, 2026